Improvement Plan
A sequenced three-part roadmap that puts measurement and consolidation before more publishing.
Part 1Use analytics and fix the site foundation
Use existing data for a more exact report
Search Console and GA4 data was not available for this audit. Reviewing these reports will show which searches and pages bring the right visitors and which visits become real inquiries.
What to look forSearch ConsoleQueries · impressions · clicks · landing pages · countries · indexing issuesGA4Organic landing pages · downloads · application starts · forms · booked calls, where recordedReview or export the reports
You can review and export the figures yourself, or allow a reviewer to see them without sharing your password.
Review or export the reports yourself
- Open Search Console Performance, select the
yanaimmis.comproperty and the intended date range, then review or export Queries, Pages, Countries, clicks, and impressions. - Open Google Analytics and review organic landing pages plus downloads, application starts, forms, or booked calls where those events are recorded. Export the same date range for comparison.
Share read-only access
- In Google Search Console, choose the
yanaimmis.comproperty, then click Settings → Users and permissions → Add user. - Enter the reviewer’s Google-account email, choose Full rather than Owner, then click Add.
- In Google Analytics, open Admin → Property access management → + → Add users. Enter the reviewer’s email, choose Viewer, then click Add.
Squarespace: Search ConsoleGoogle: Search Console usersSquarespace: GA4Google: GA4 access
- Open Search Console Performance, select the
Keep one homepage, about page, and application page
Each purpose currently has competing URLs. Keeping the fuller page and redirecting its duplicate concentrates links and search signals on one address instead of splitting them.
Homepageyanaimmis.com/keep/home · /study-abroadredirectAbout/about-mekeep/learn-about-meredirectApplication/apply-to-any-university-and-country-herekeep/applicationredirectSet the exact surviving pages and redirects
Preserve any unique useful copy, then make every link lead directly to the selected page.
- In Pages, hover the root homepage and click the gear icon. Scroll to Set as Homepage, click it, confirm, then click Save. Keep
https://www.yanaimmis.com/as the homepage. - Before retiring anything, copy any unique useful content from
/homeand/study-abroadinto the root homepage; from/learn-about-meinto/about-me; and from/applicationinto/apply-to-any-university-and-country-here. - For each retired page, open its gear → General; disable it or move/delete it only after its replacement is ready.
- Open Developer Tools → URL Mappings. Add one mapping per line:
/home -> / 301,/study-abroad -> / 301,/learn-about-me -> /about-me 301, and/application -> /apply-to-any-university-and-country-here 301. Click Save. - Update navigation buttons and text links so they point directly to
/,/about-me, and/apply-to-any-university-and-country-here.
Squarespace limitation: the root
/cannot be redirected. Squarespace generates canonical tags and the sitemap automatically; do not inject a second canonical tag. Consolidate with the homepage setting, surviving pages, direct internal links, and 301 redirects.Verify: open each retired URL in a private window and confirm it changes once to the intended final URL. Then check the live sitemap; updates usually appear within an hour but can take 24 hours.
- In Pages, hover the root homepage and click the gear icon. Scroll to Set as Homepage, click it, confirm, then click Save. Keep
Confirm changed pages can still be found
Recheck redirects, preferred URLs, sitemap status codes, and the 404 response after structural changes. This catches publishing mistakes before they hide a page from visitors or search engines.
Save in Squarespace→Open public page→Check sitemap→Request indexingVerify publishing, sitemap, and indexing
Saved public-page settings are live; search systems update later.
- After each page or settings edit, click Save. For draft blog items, choose Published and save only when the post is ready.
- Open the public URL in a private browser window and verify the visible content, title, links, and redirect behavior.
- Open yanaimmis.com/sitemap.xml. Squarespace generates it automatically; it cannot be hand-edited and may take up to 24 hours to update.
- In Search Console, choose the property → Sitemaps → enter
sitemap.xml→ Submit. Use URL Inspection for the highest-priority changed pages and request indexing.
Remember: the live site can change immediately while Google and social networks still show cached information until they recrawl.
Choose how missing pages should appear
Nonexistent addresses currently return the correct 404 signal but display the homepage. You can keep that behavior or use a dedicated message if you want visitors to know what happened and see clear ways to continue.
Current→/page-that-does-not-existHomepage appearsOptionalPage not foundHome · Blog · Contact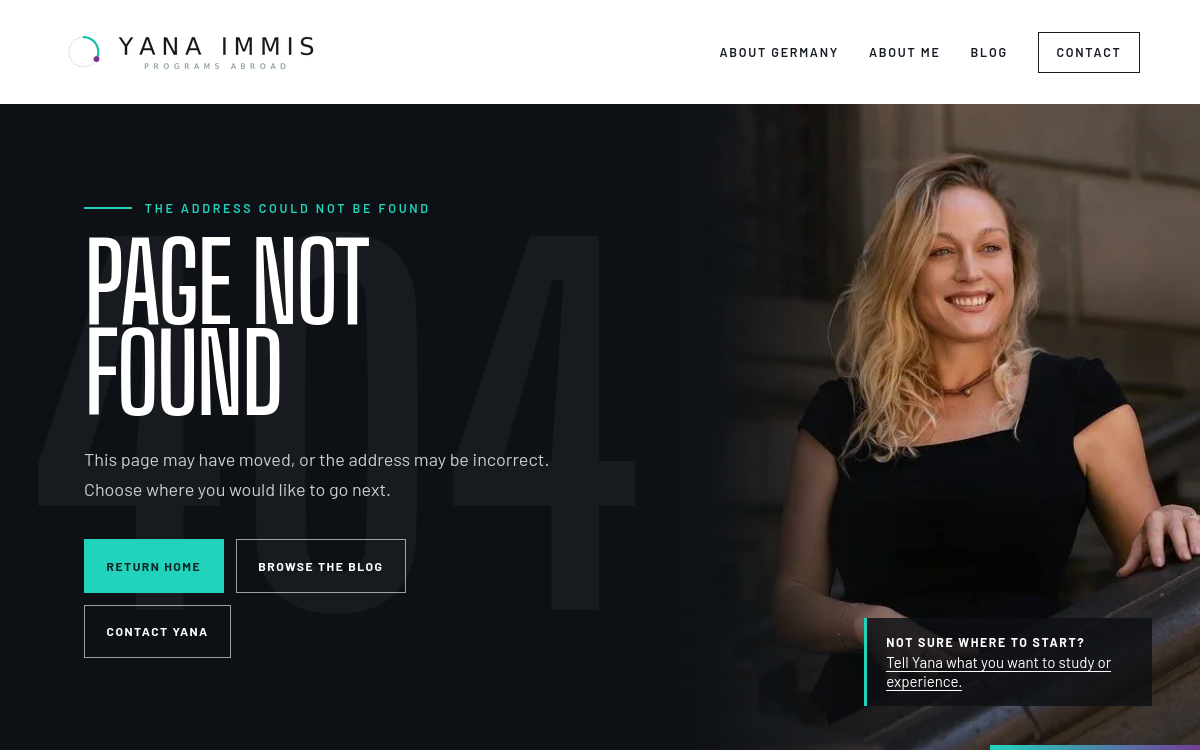 404 page designOpen the full example ↗
Add a dedicated missing-page message
Use these steps only if you choose this option; keep the working HTTP 404 status.
- In Pages, create a new blank page with a plain “Page not found” heading, one short explanation, and buttons to the homepage, blog, and contact page.
- Move this page into Not Linked.
- At the bottom of Pages, open System Pages → 404 Page.
- Choose the new page from the dropdown and click Save.
Squarespace note: a custom 404 can be reported as a “soft 404” in Search Console even when visitors benefit from it. Keep the copy unmistakably about a missing URL and monitor it there.
Verify: open a made-up URL in a private window. It should visibly say the page was not found, offer recovery links, and still return HTTP 404.
Give every page a clear heading order
Use a clear main heading, then organize major sections with H2s and subsections with H3s. This helps readers and screen-reader users understand the page; it is not an “exactly one H1” Google rule.
H1Programs Abroad for Any AgeH2Choose your destinationH3Study in the United KingdomCorrect the heading structure page by page
Use the inventory to find pages with no main heading or several competing main headings.
Open headings for all 198 sitemap pages.
- Open Pages → the affected page → Edit.
- Click or double-click the text block, select the line, and open the Format dropdown in the text toolbar.
- Choose Heading 1 for the page’s clear main topic. Use Heading 2 for major sections, Heading 3 for subsections, and Paragraph for ordinary copy.
- Remove empty heading blocks and do not choose heading styles only to make text visually larger.
- Click outside the block, then click Save.
Why this is scoped carefully: Google does not impose a one-H1 ranking rule. This work improves clarity, scanning, and screen-reader navigation; it should not flatten deliberate article structure.
Verify: reopen the public page and confirm the visible hierarchy matches the page outline in the crawl table.
Make search titles and descriptions distinct
Resolve missing, repeated, and overly long fields while preserving clear ones. These labels help people choose the right result and help search engines distinguish pages with similar subjects.
www.yanaimmis.com › study-abroadStudy Abroad Guidance for Every Age | Yana ImmisChoose a country, university, and application route with independent guidance from Yana Immis.
Edit page and blog titles and descriptions
Work from the full crawl table so every flagged URL is accounted for.
Open the complete 198-page metadata table and the reconciled issue groups.
Normal pages
- Open Pages, hover the page, and click the gear icon.
- Open SEO. Edit SEO Title and SEO Description, then click Save.
Blog posts
- Open Pages → the blog, hover the post, and click Edit.
- Click the top-right gear → SEO. Edit SEO Title and SEO Description, then click Save. If the item is still a draft, set its status to Published only when it is ready.
Homepage
- Open Marketing → SEO / AI Visibility → SEO Settings → Search Appearance → Home.
- Edit SEO Title Format and SEO Site Description, then click Save. Keep the page/item variables in the Pages and Items formats so individual names do not disappear.
Verify: reload the public page, check the browser-tab title, and use View Source to confirm one description and one canonical. Google may rewrite or cache result wording, so a saved edit will not appear in search immediately.
Make the site identity consistent everywhere
Align business details, favicon, share images, and social text. Consistent information helps search systems connect the site to the same organization and gives shared links a recognizable preview.
 Yana ImmisSame name and contact detailsStudy abroad with Yana1200 × 630 share image
Update the favicon, share images, and social text
Use native settings first; networks can still crop, truncate, or cache a preview.
Favicon
- Open Design → Favicon.
- Upload a square PNG between 100 and 300 pixels and no larger than 100 KB; 144×144 gives browsers a sharper source to resize. WebP is not the problem—the current 32×32 file simply contains fewer pixels, and neither size nor format directly improves rankings.
- Add an optional dark-mode alternate, then click Save.
Share images
- For the sitewide fallback, open Design → Social Sharing → + → upload or select the image → Save.
- For a normal page: Pages → page gear → Social → Upload an Image → Save.
- For a blog post: open the post → Edit → top-right gear → Social → upload Alternate Social Sharing Image → Save.
No separate native Facebook/X text field: Squarespace usually supplies page/post SEO title and description; the homepage uses its title format and SEO site description. LinkedIn may show only the title. Networks decide the final crop, truncation, and cached version.
Verify: test the public URL in the Facebook Sharing Debugger, LinkedIn Post Inspector, and an X post composer. Confirm the image loads over HTTPS.
Align business data without duplicating Squarespace output
Correct native business information before adding custom code.
- Open Settings → Selling → Business Information.
- Review the business name, contact details, location, and hours, then click Save.
- Only if required fields remain unavailable, prepare one valid JSON-LD block. For sitewide code, open Developer Tools → Code Injection → Header; for one page, use page gear → Advanced → Page Header Code Injection. Paste the script and click Save.
Advanced-code limitation: Code Injection depends on the Squarespace plan, and Squarespace does not troubleshoot custom code. Never add a second canonical or duplicate Organization/LocalBusiness record. A developer should merge and validate any custom schema.
Verify: test the public URL in the Google Rich Results Test and Schema.org Validator, and check the source contains one consistent business record.
Improve the slow mobile first view
Use the six retained PageSpeed reports and qualified GTmetrix capture to reduce the wait before useful content appears. Faster pages are easier to use and less likely to lose visitors before they engage.
53Saved homepage mobile score→RetestSame URL and conditions after each changeReduce first-view weight and retest consistently
Make one change at a time so the result can be attributed.
- Duplicate the affected page or record the current layout before editing.
- Open the page → Edit. Replace oversized first-screen images with correctly cropped, compressed files; remove duplicate galleries, video backgrounds, social widgets, or embeds that are not essential.
- Open Developer Tools → Code Injection and inventory third-party scripts. Remove only scripts whose owner and purpose are known; save after each safe removal.
- Click Save, then rerun the same PageSpeed mobile URL and condition used in the baseline.
Squarespace limitation: platform scripts and hosting cannot be removed. Focus on uploaded media, page layout, third-party embeds, and account-added code.
Verify: compare LCP, blocking time, and visual behavior against the saved six-page baseline; also test navigation and forms after script changes.
Part 2Turn the library into guided journeys
Group related guidance into topic hubs
Bring country choice, university choice, funding, visas, accommodation, and employability into clear starting pages. Visitors can follow a path instead of searching a large article library one post at a time.
Study in CanadaChoose a universityVisa guidanceFunding optionsApply with YanaCreate a topic hub
Create and publish a useful topic landing page.
- Open Pages. Click + beside the intended navigation area, choose Blank Page, enter the hub name, and press Enter. Drag it to Not Linked if it should be reached only through contextual links.
- Open the page → Edit → Add Section → Blank. Click Add Block and add one Text block for the introduction.
- Click Add Block → Summary → pencil icon → Content. Under Select a Page, choose the blog or collection to feature; under Design, choose a readable list or grid. Add separate text or button blocks for services, institutions, and success stories that are not in that collection.
- Click Save. Return to Pages → hub gear → SEO, enter the SEO title and description, and click Save again.
Verify: open the public hub in a private window. Confirm every card and button reaches the intended page and the hub works at phone width.
Keep only useful category and tag pages searchable
Keep archive pages that collect enough distinct, related material to help a visitor. Thin or overlapping archives create extra search results that add little and can compete with stronger pages.
Keep/blog/category/NewsDistinct, maintained collectionReview/blog/tag/studyThin or overlaps another archiveReview category and tag archive pages
Keep useful topic destinations; hide or consolidate thin overlaps.
Open all 31 category and tag archives.
- For a post, open Pages → the blog → hover the post → … → Settings → Options.
- Under Categories or Tags, select or type the intended term, press Enter, then click Save.
- To rename or delete a term, hover the blog in Pages → gear → Advanced → Manage Categories or Manage Tags. Select the term, edit or delete it, confirm, then save.
- To hide filtered archive URLs, open the blog’s Page Settings → SEO → Hide from search engines and choose the filtered/static URL option. Do not select “All pages in this collection” unless the entire blog and its posts should be hidden.
Squarespace limitation: individual category/tag title formats cannot be customized natively. Term changes apply within that blog collection and do not repair old hand-written links automatically.
Verify: open the archive publicly, check whether it still belongs in the sitemap, and inspect important old links after a rename.
Show when time-sensitive guidance was reviewed
On articles about visas, finance, permits, or regulations, a short review date and direct links to official rules help readers confirm that requirements are current.
Example only · Visa guideLast reviewed September 2026 · Yana ImmisOfficial government visa guidance ↗Add the review note and source links in Squarespace
Use this format on articles where rules, dates, or fees may change.
- Open Pages → the blog → open the relevant post → Edit.
- Near the introduction, add a short visible line such as “Last reviewed September 2026 · Yana Immis.”
- Select the text that refers to an official rule → click the link icon → Web Address → paste the official government or institution URL → enable Open in New Window.
- Click Save. If the review changed the article’s focus, open the post settings → SEO and update the title or description so they still match the page.
Verify: open the public article and confirm the review note is visible and each official-source link opens the intended page.
Connect articles to the next useful page
Link each article to its hub, a relevant story, the matching service, and a clear next step. This helps visitors continue their research and helps search engines understand how related pages fit together.
Canada article→Canada hub→Student story→Application pageAdd internal text and image links
Add clear links in text and images.
- Open the source page or post → Edit. In a text block, select words that clearly name the destination, click the link icon, choose Page, search for and select the page, then click Save in the link editor.
- For an image block, click the image → pencil icon → Content → Link. Choose Page, select the destination, and leave Open in New Window off for an internal page.
- Click the page-level Save.
Verify: open the public page and test each new link. It should go directly to the final HTTPS URL without an extra redirect.
Describe meaningful images and linked media
Add useful alternative text and clear link destinations, while leaving decorative images empty. This lets screen-reader users understand information that would otherwise exist only visually.
Instead of: image123.jpg
Use: Yana advising a student at an international education fairAdd image descriptions, captions, and usable gallery links
Describe images and make linked media understandable.
- For an image block, open the page → Edit → click the image → pencil icon → Content. Enter concise Alt Text that states the image’s useful meaning; leave it empty only when the image adds no information. Add a caption only when visitors need visible context.
- If that image is clickable, use Content → Link to choose the destination. The alt text should describe the image itself; nearby visible link text should explain where the link goes.
- For a gallery section, click Edit Section → Content. Open each image’s settings, add its available alt-text/description field and caption, then repeat for every meaningful image.
- Open the gallery’s Design settings. Keep navigation controls visible when visitors need them, close the editor, and click the page-level Save.
Squarespace limitations: field names differ between image blocks, gallery blocks, gallery sections, and collection images. Squarespace supplies gallery arrow/button code and responsive image variants; the normal editor does not provide custom accessible-name or loading-priority fields for those controls. If a keyboard or screen-reader test still finds an unnamed control, a developer must assess custom code, which Squarespace does not support.
Verify: open the public page, use Tab and Enter through every linked image and gallery control, and confirm the visible focus order, destinations, captions, and meaningful image text.
Remove unnecessary scripts, embeds, and first-view media
Keep only additions with a clear purpose and prioritize the first visible content. Every extra script or large media item gives a phone more work before the page becomes usable.
55 script elements245 image elements451 KB uncompressed HTMLReduce scripts, embeds, and first-view media
Remove only additions whose purpose and owner are known.
- Open the page → Edit. Replace oversized first-screen images with correctly cropped, compressed files; remove duplicate galleries, video backgrounds, social widgets, or embeds that are not essential.
- Open Developer Tools → Code Injection and inventory third-party scripts. Remove only scripts whose owner and purpose are known; save after each safe removal.
- Click Save, then rerun the same PageSpeed mobile URL and condition used in the baseline.
Squarespace limitation: platform scripts and hosting cannot be removed. Focus on uploaded media, page layout, third-party embeds, and account-added code.
Verify: compare LCP, blocking time, and visual behavior against the saved six-page baseline; also test navigation and forms after script changes.
Part 3Build authority around proven demand
Expand topics with proven visitor demand
Use Search Console and inquiry data to decide which existing or suggested subjects deserve deeper guides. This directs effort toward questions real students ask instead of publishing for volume alone.
estudiar en el extranjeroUbersuggest estimate: 480 searches · difficulty 26+Search ConsoleConfirm queries, clicks, pages, and inquiriesChoose and publish a demand-led page
Use measured demand to choose and publish one useful page.
- Outside Squarespace, open Search Console → Performance → Search results. Set a comparison date range, open Queries and Pages, apply the relevant country or service filter, and click Export. Compare clicks and inquiries with the supplied Ubersuggest ideas; estimates alone do not justify a new page.
- Choose one visitor question with evidence and a different purpose from existing pages. In Squarespace, open Pages → + → Blank Page, or open the blog → + for a post.
- Add the answer, sources, relevant service link, and next step. Open the page/post settings → SEO, complete the title and description, then click Save. Publish a draft post only when review is complete.
Verify: open the public URL, confirm it is distinct from existing pages, then use Search Console URL Inspection to request indexing.
Publish resources relevant partners can cite
Create institution pages, alumni stories, expert contributions, or original research worth referencing. Relevant outside links can introduce qualified visitors and give search engines independent context about the site.
Yana’s original guide← linked by ←University or student organizationPublish something partners can cite
Publish an asset that relevant partners can cite.
- Create the useful page first: Pages → + → Blank Page. Add original research, a partner profile, an expert contribution, or a documented alumni result with permission.
- Use Add Block → Text for the source and author information. Add outbound sources with the link icon → Web Address; add relevant site pages with link icon → Page.
- Open page gear → SEO, complete its title and description, then click Save.
Outside Squarespace: permissions, partner approval, outreach, and relationship tracking belong in the project tracker or CRM. Squarespace publishes the asset; it does not earn or verify outside links.
Verify: check the public page, attribution, permission record, and all source links before sending the URL to any partner.
Give every student story a searchable structure
Use consistent details while preserving the student’s real voice and permission. Clear destinations, programs, challenges, and outcomes help visitors find a story relevant to their own decision.
DestinationInstitutionProgramChallengeResultAdviceCreate a consistent success story
Create a consistent, approved story page.
- In Pages, hover the strongest existing story page, click its gear or … menu, choose Duplicate, and confirm. Rename the copy immediately.
- Open the duplicate → Edit. Replace the student name, destination, institution, program, challenge, result, advice, image, image alt text, and permission note. Remove every detail that belongs to the original person.
- Open page gear → General and set a unique URL slug. Open SEO and set a unique title and description. Open Social and upload the approved story image.
- Click Save. Keep the page in Not Linked until the student or owner approves publication; then move it to the intended section.
If Duplicate is unavailable: create a blank page and rebuild the same section order. Consent and factual approval happen outside Squarespace and must be recorded before publication.
Verify: open the public story and confirm the URL, person, result, image, share preview, and links are unique to that student.
Review search, inquiries, speed, and site health monthly
Compare the same measures on a regular schedule. This shows whether changes help, catches broken routes or outdated content, and prevents one tool’s score from being mistaken for the business result.
☐ Search visibility☐ Qualified inquiries☐ Mobile speed☐ Broken links☐ Content dates☐ Sitemap and redirectsRun the monthly review
Review search, inquiries, speed, and site health together.
- Outside Squarespace, export Search Console Performance data and GA4 organic landing-page conversions for the same dates. Record non-brand clicks, qualified inquiries, and pages gaining or losing meaningful traffic.
- In Squarespace, open Analytics → Traffic, Search Keywords, and Form & Button Conversions. Use the same date range and record the visible totals in the monthly audit sheet.
- Retest priority URLs in PageSpeed Insights. Open
https://www.yanaimmis.com/sitemap.xml, recent redirect sources, and one made-up URL. Record any sitemap omission, redirect failure, or unclear 404 experience. - Choose one related batch of edits. Make each change using the matching procedure above, click Save on every affected page or settings panel, and record the public verification date.
Outside Squarespace: the combined monthly sheet, cross-tool comparison, crawl, and decision log must be maintained separately; Squarespace does not combine Search Console, GA4, PageSpeed, and editorial-review data into one report.
Verify: every completed action has a public URL, before/after evidence, an owner, and the date it was checked. Carry unresolved items into the next month instead of marking them complete.
Recommended priority board
On smaller screens, scroll the table sideways to view every column.
| Priority | Action | Completion evidence | Primary measure |
|---|---|---|---|
| Immediate | Mobile performance remediation | Before-and-after test under matching conditions | Main-content display time, interaction delay, and layout stability |
| Immediate | Core URL consolidation | Redirect map, updated sitemap, and one canonical per purpose | Indexed duplicate URLs |
| Immediate | Heading and accessibility repair | Clear main topic, logical outline, named linked media | Template audit pass rate |
| Immediate | Measurement and conversion review/setup | Account review or export, event check, and first baseline | Qualified leads by landing page |
| High | Content refresh and hub architecture | Reviewed dates, authority citations, hub links, merged overlaps | Non-brand clicks and leads supported by these pages |
| Planned | Partnership and authority development | Relevant new mentions and referring pages | Relevant websites linking to Yana’s site |